MiraBot Firmware Flasher is a dedicated web-based tool for restoring or updating MiraBot firmware. It is compatible with MiraBot S6, Lite, S2+, and other MiraBot devices, and is not intended for use with third-party OSR devices.
Preparation
- PC: Windows
- Cable: USB Type-C
- Browser: Google Chrome (recommended)
- Firmware Flashing Tool : https://miraplay.fun/flasher/mirabot.html
⭐ Procedure
1. Connect the DDevice
Connect your MiraBot to your PC using a USB Type-C cable. The device does not need to be powered on, as the USB connection provides power to the ESP32 controller.
2. Open the Flashing Tool
Open the flashing tool in Chrome.
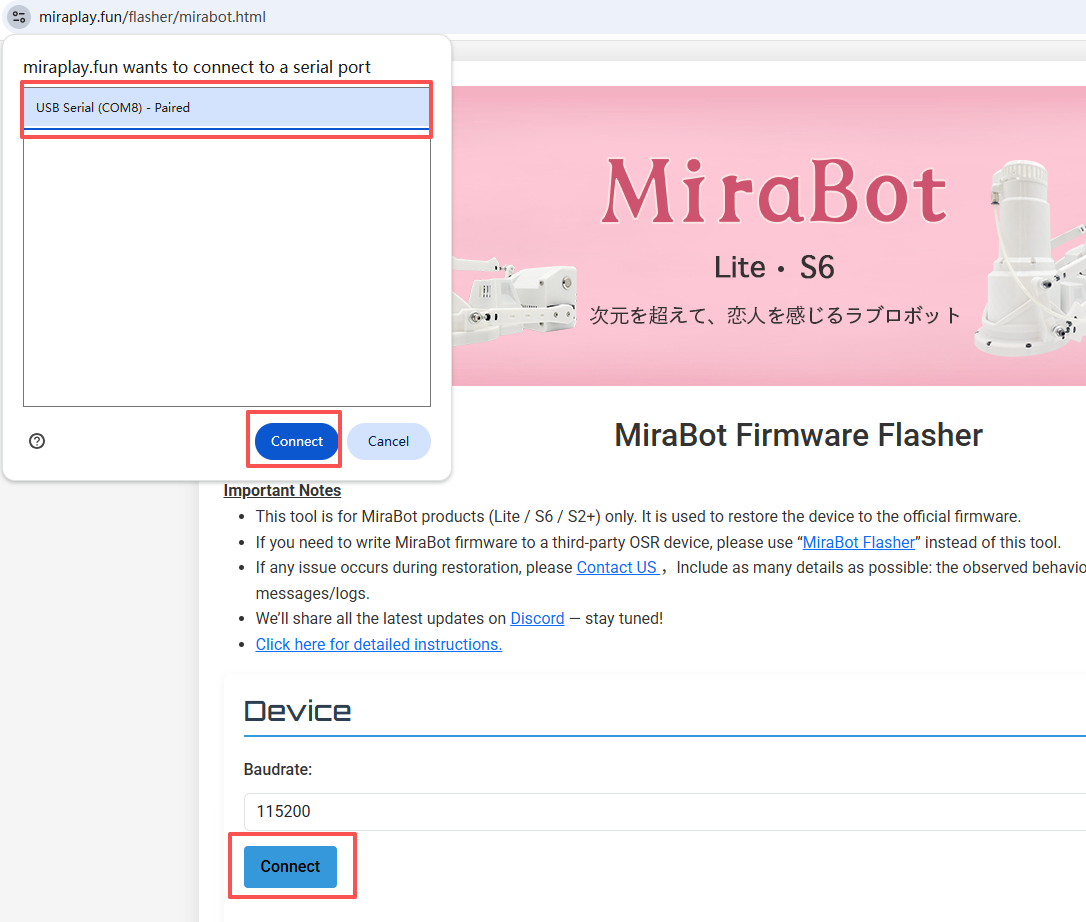
3. Establish a Serial Connection
Leave the Baud rate at the default value (115200).
Click [Connect], and a serial connection dialog will appear.
Select the port where the MiraBot is connected (e.g., COM8) and click [Connect].
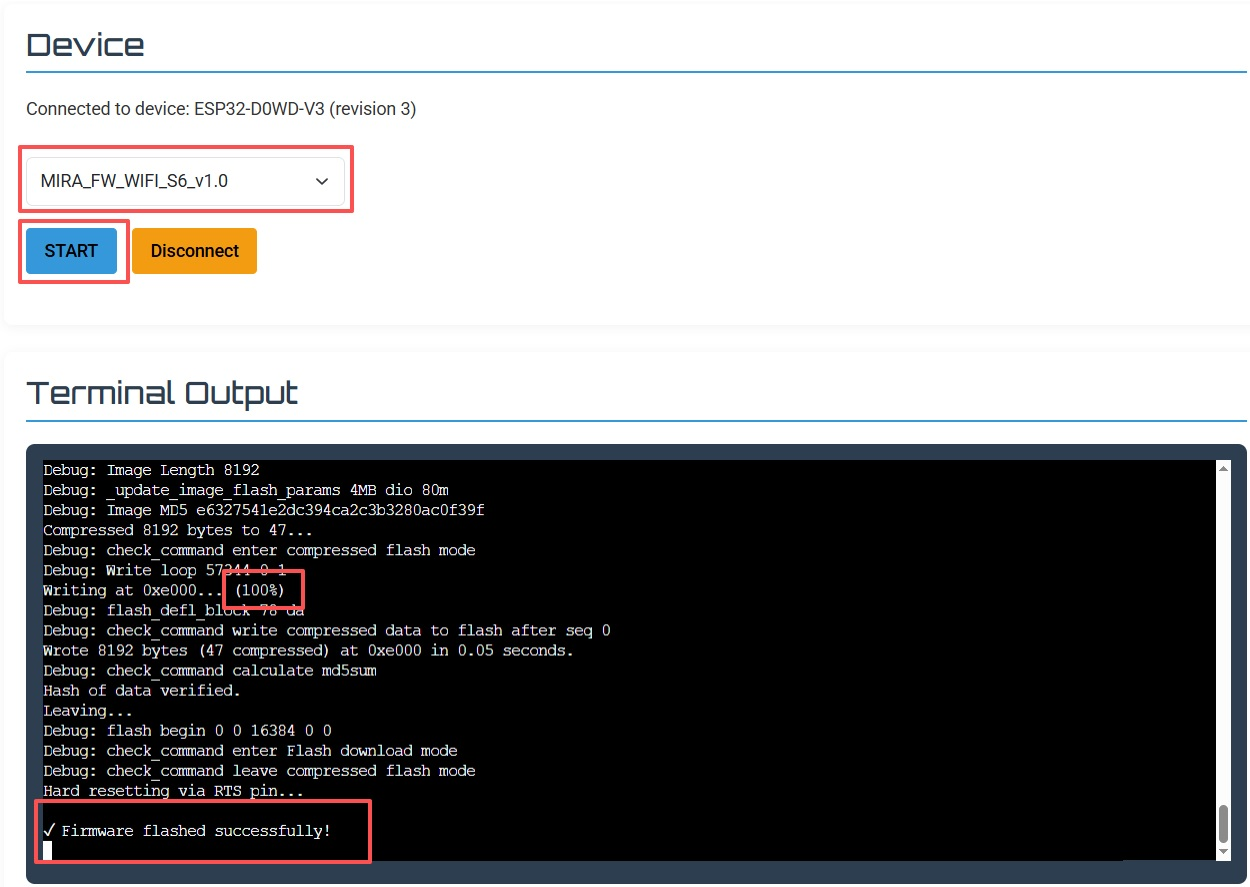
4. Start flashing
Once the device is connected, select your device model (Lite / S6 / S2+) and the desired connection mode (BLE or WiFi) from the firmware list, then click [START].
- The flashing progress and log will appear in the Terminal Output section at the bottom of the screen.
- The restore process is complete once the progress reaches 100%.
Note: Do not disconnect the USB cable during the flashing process.
5. Disconnect
Click [Disconnect], then unplug the USB cable.
⭐WiFi Configuration
If you have flashed the Wi-Fi firmware version, please follow the steps below to connect the device to your Wi-Fi network.
- Connect the device
Connect your MiraBot to your PC using a USB Type-C cable. If you have just finished flashing the firmware, please unplug and reconnect the USB cable to restart the controller. - Open the WiFi configuration tool
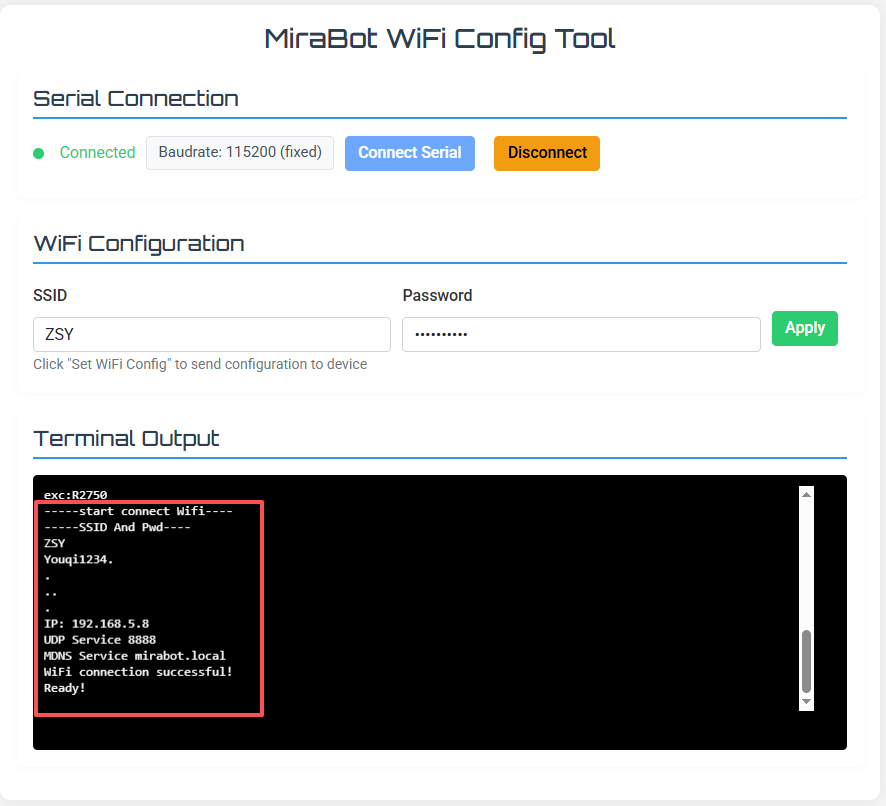
Open the following URL in browser(Chrome): https://miraplay.fun/flasher/setwifi.html - Establish a serial connection
Click [Connect Serial], and a serial connection dialog will appear.
Select the port where the MiraBot is connected (e.g., COM8) and click [Connect]. - Configure WiFi
Once the device is connected, enter your WiFi SSID and password, then click [Apply].
-The configuration and connection results will appear in the Terminal Output section.
-If the connection fails, verify that the SSID and password are correct.
⭐ Operation Test
1. Launch MiraPlay AiO
Open MiraPlay AiO, log in to your account, and connect MiraBot.
- First time using MiraPlay AiO? Please see the MiraPlay AiO User Guide.
2. Run the motion test
Go to My → Motion Test.
Each slider corresponds to a motion axis.
Move each slider to confirm all axes operate normally.
Displayed axes differ by model:
- S6: 6 axes (including Twist)
- Lite / S2+: 4 axes (including Twist)

⭐ Initial Position Check (Horizontal Alignment)
After powering on, check whether both arms are aligned on the same horizontal plane in their initial position.
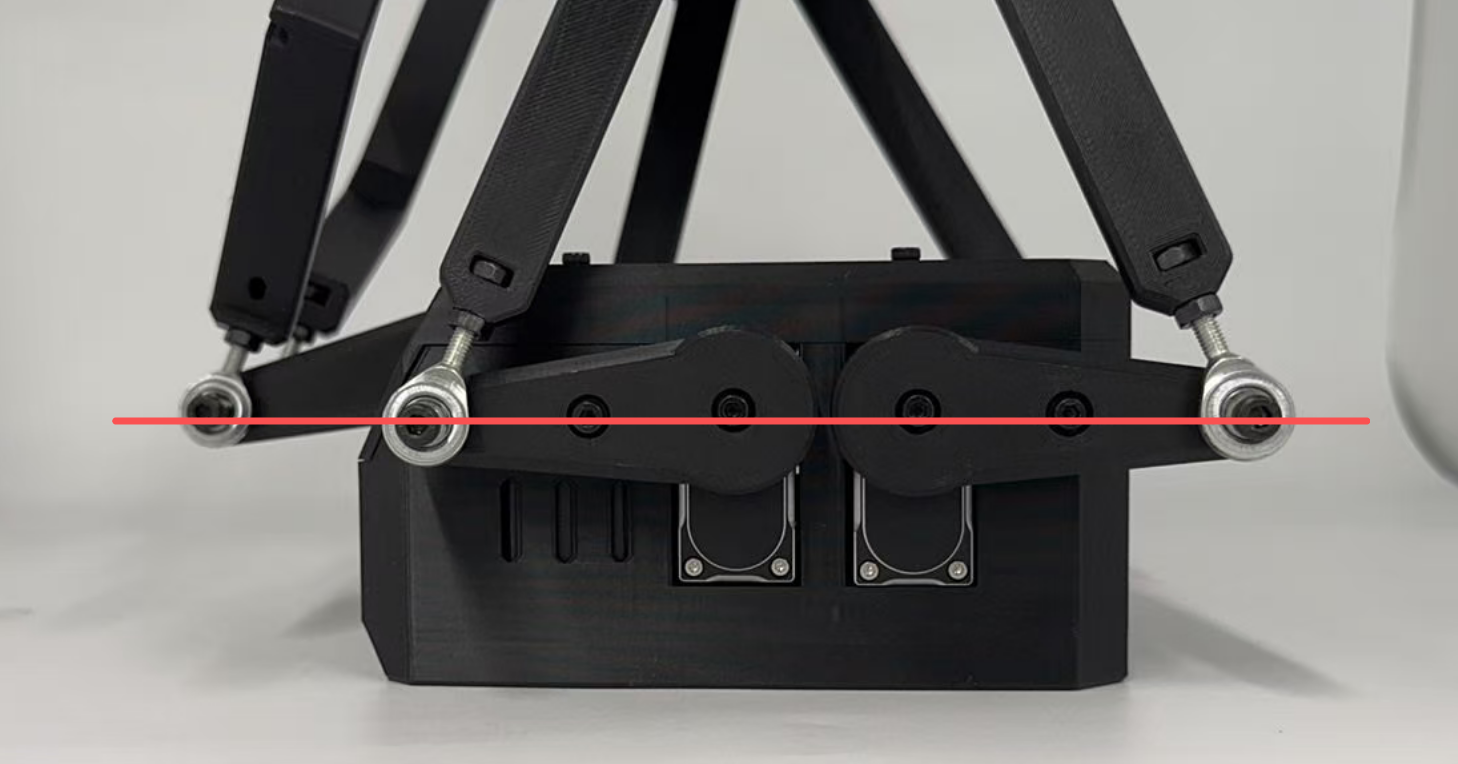
If alignment is off:
- Open My → Arm Initial Settings.
- Fine-tune each axis using + / −, based on the default value (1500).
- + = clockwise micro-adjustment
- − = counterclockwise micro-adjustment

⭐ Common Troubleshooting
If the restore doesn’t progress:
- Ensure the correct USB/COM port is selected
- Try another USB port or cable
- Restart the device and reconnect
If you cannot use the latest MiraPlay AiO features after completing the restore:
Please contact us and include your order number.