⭐Prerequisites
- PC: Windows
- Cable: USB Type-C
- Browser: Google Chrome (recommended)
- Flashing Tool: https://miraplay.fun/flasher/osr.html
Note: This firmware supports standard OSR only (ESP32 Devkit, TempestMax original wiring).
⭐Flashing Steps
- Connect the OSR device to your Windows PC via USB Type-C.
- Open the flashing tool in Chrome (URL above).
- Leave Baudrate at the default 115200. Click [Connect] to open the serial selection dialog.
- Select the COM port your device is on (e.g., COM8) and click [Connect] in the dialog.

5. Once connected, select the appropriate firmware based on your device type. For example:
- MIRA_FW_BLE_SR6 — BLE (Bluetooth Low Energy) firmware for SR6 devices
- MIRA_FW_WIFI_OSR2+ — Wi-Fi firmware for OSR2+ devices
Then click [START] to begin flashing the firmware.
- Installation logs appear in Terminal Output at the bottom.
- When progress reaches 100%, flashing is complete.
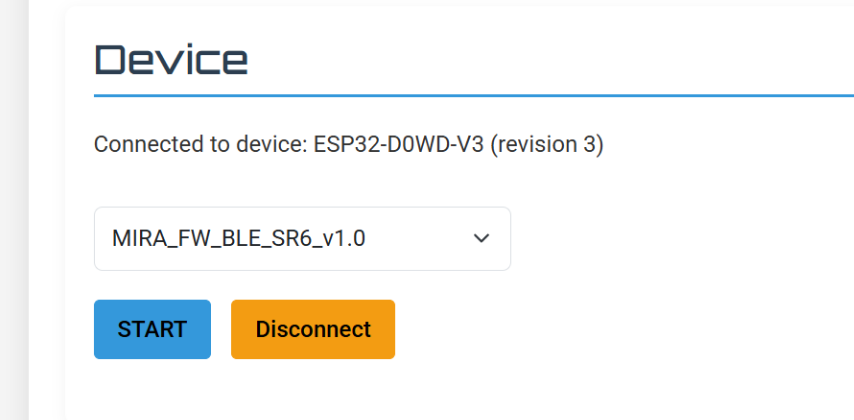
6. Click [Disconnect], then unplug the USB cable.
Note: The new firmware will take effect after you restart the device.
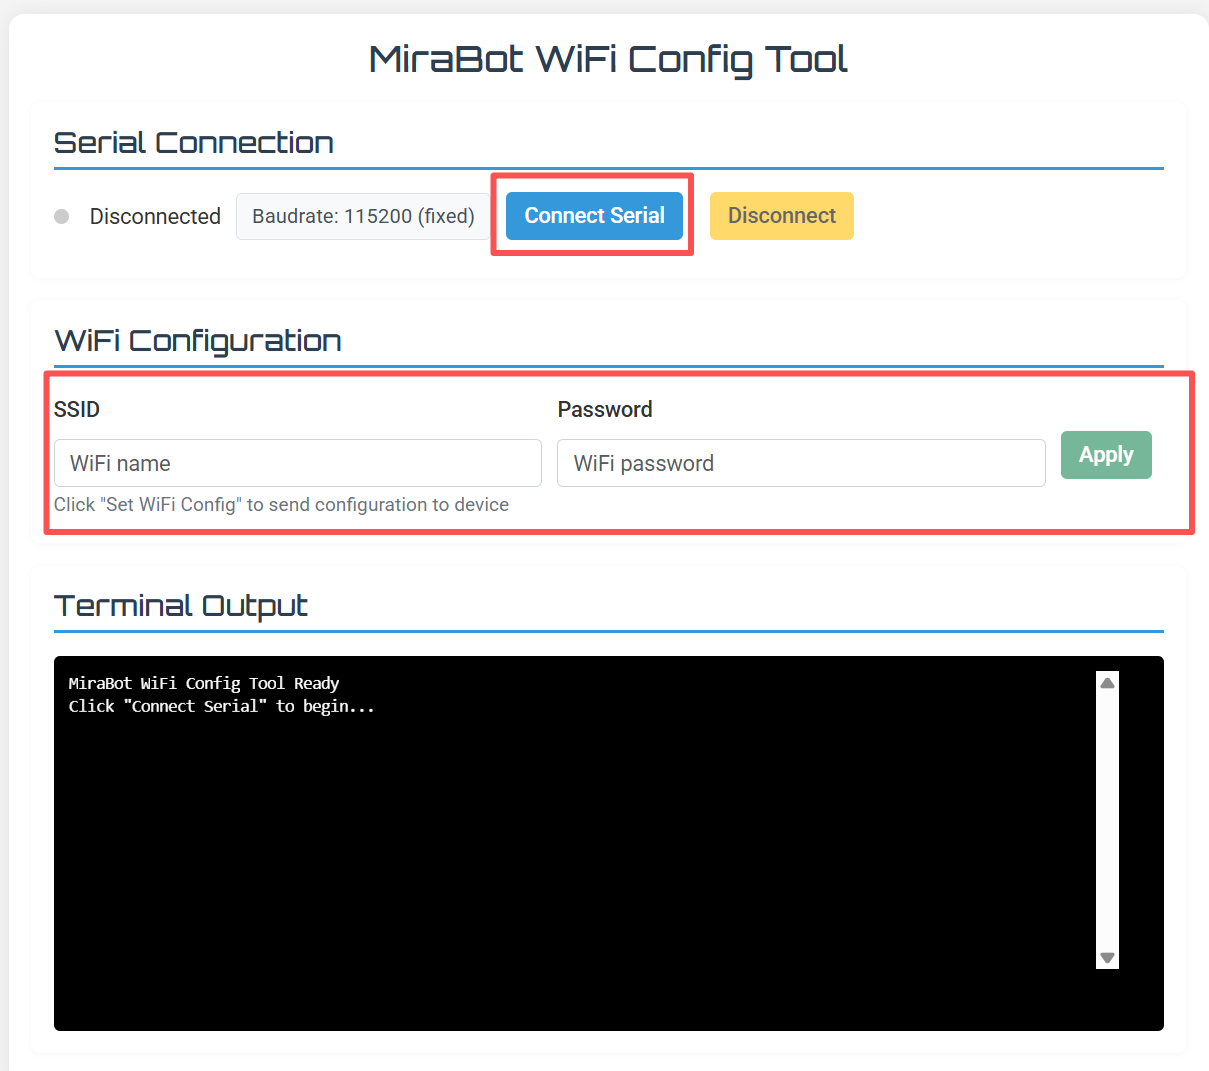
⭐Configure Wi-Fi
If you have flashed the Wi-Fi firmware, you will need to configure a Wi-Fi connection for the device. Follow the steps below:
- Open the Wi-Fi Config Tool.
- Connect the device via USB. The process is essentially the same as steps 1–4 in the Flashing Steps section.
- Enter your Wi-Fi network name (SSID) and password, then click [Apply].
- If the connection and settings are correct, a success message will appear in the Terminal Output below.
⭐Post-Flash Test (Operation Check)
- Launch MiraPlay AiO and sign in to your account.
- On first use, your device list will be empty. Tap “Add Device” at the bottom to open the add screen. Select “MiraBot” as the device type (OSR devices flashed with MiraBot firmware will be recognized as MiraBot devices). Then follow the setup wizard step by step according to your firmware type. If you choose Wi-Fi connection, you can keep the domain, port, and other settings at their default values. For detailed instructions on how to use MiraPlay AiO, please refer to the MiraPlay AiO Introduction.
- Open My → Motion Test. The on-screen sliders correspond to each motion axis.
- Move each slider and confirm every direction responds normally.
- The number of axes depends on the model:
- SR6: 6 axes (includes Twist)
- OSR2+: 4 axes (includes Twist)

⭐Initial Pose Check (Leveling)
- Right after power-on (default/home position), verify the left and right arms are level on the same horizontal plane.
- If they are misaligned, open My → Arm Initial Setup and fine-tune each axis around the default value 1500 using +/−.
- + / − apply clockwise / counter-clockwise micro-adjustments.

⭐Common Issues & Tips
If flashing does not progress:
- Make sure the correct USB (COM) port is selected.
- Try a different USB port/cable.
- Restart the device and reconnect.
If, after reaching 100%, MiraPlay AiO still doesn’t work as expected:
- Please report the situation on Discord (logs, error messages, and screenshots help).
- Join Discord here.