This guide explains how to update or restore your MiraBot firmware using MiraPlay Web.
Starting from Firmware v1.3.0, MiraBot supports both Wi-Fi and Bluetooth LE in one firmware. You no longer need to flash separate firmware versions for Wi-Fi or Bluetooth.
Preparation
Before you start, please prepare the following:
- PC OS: Windows 10 or later
- Cable: USB Type-C
- Browser: Google Chrome recommended
- Tool: MiraPlay Web
- MiraBot device: S6 / Lite
Keep the device powered off during firmware updates. The ESP32 controller can be powered through USB during the update.
Firmware Update Procedure
Step 1: Open MiraPlay Web
Open MiraPlay Web in your browser and log in to your account.
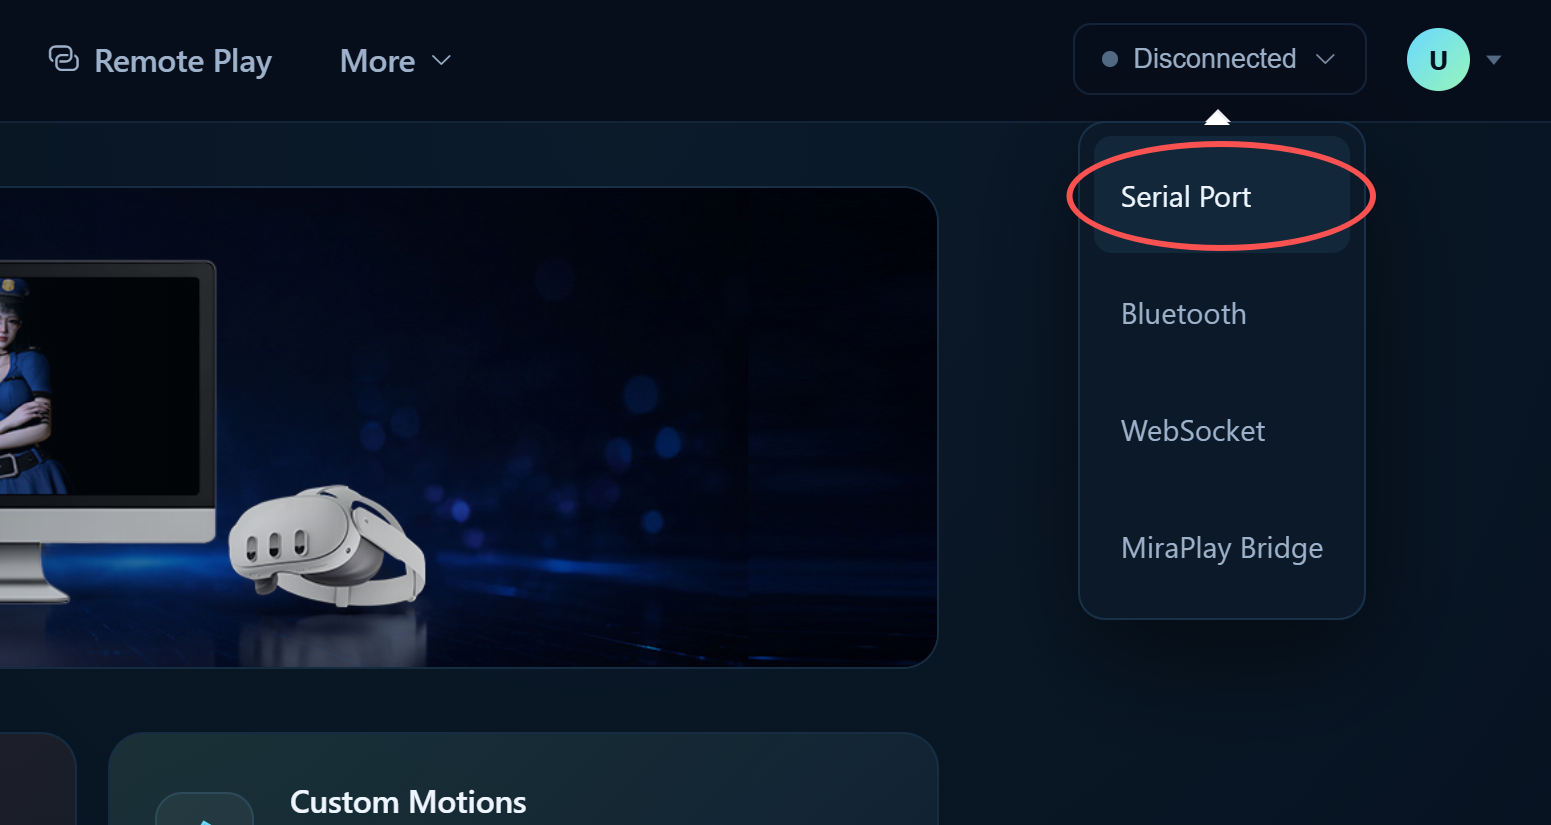
Step 2: Connect MiraBot by USB
Connect MiraBot to your computer via USB Type-C.
If prompted, allow the browser to access the serial port. Select the correct port and click Connect.
Step 3: Open Firmware Update
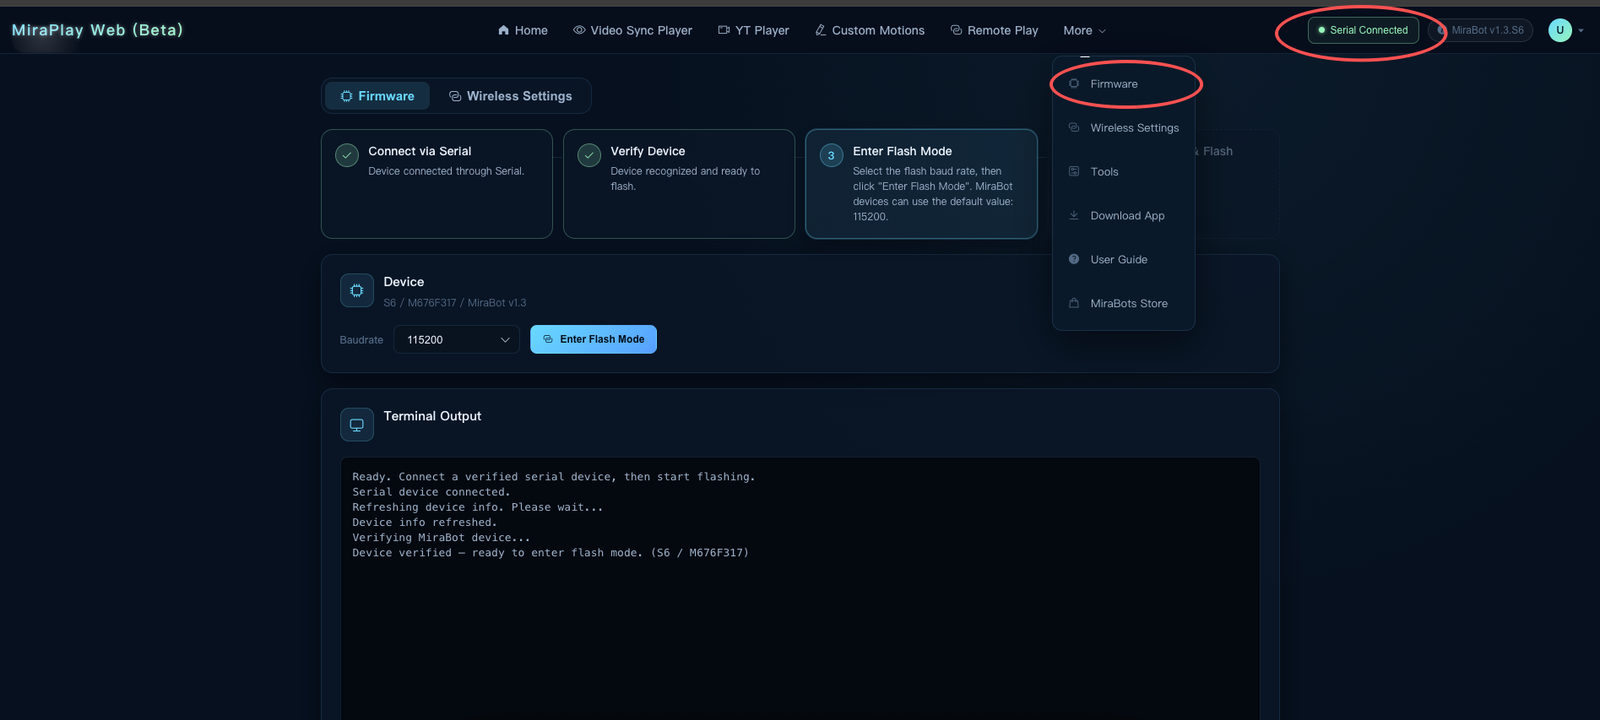
Once connected, open the upper-right menu:
More > Firmware Update
Step 4: Start the Firmware Update
Follow the on-screen instructions.
Important:
- Do not disconnect the USB cable
- Do not close or refresh the browser
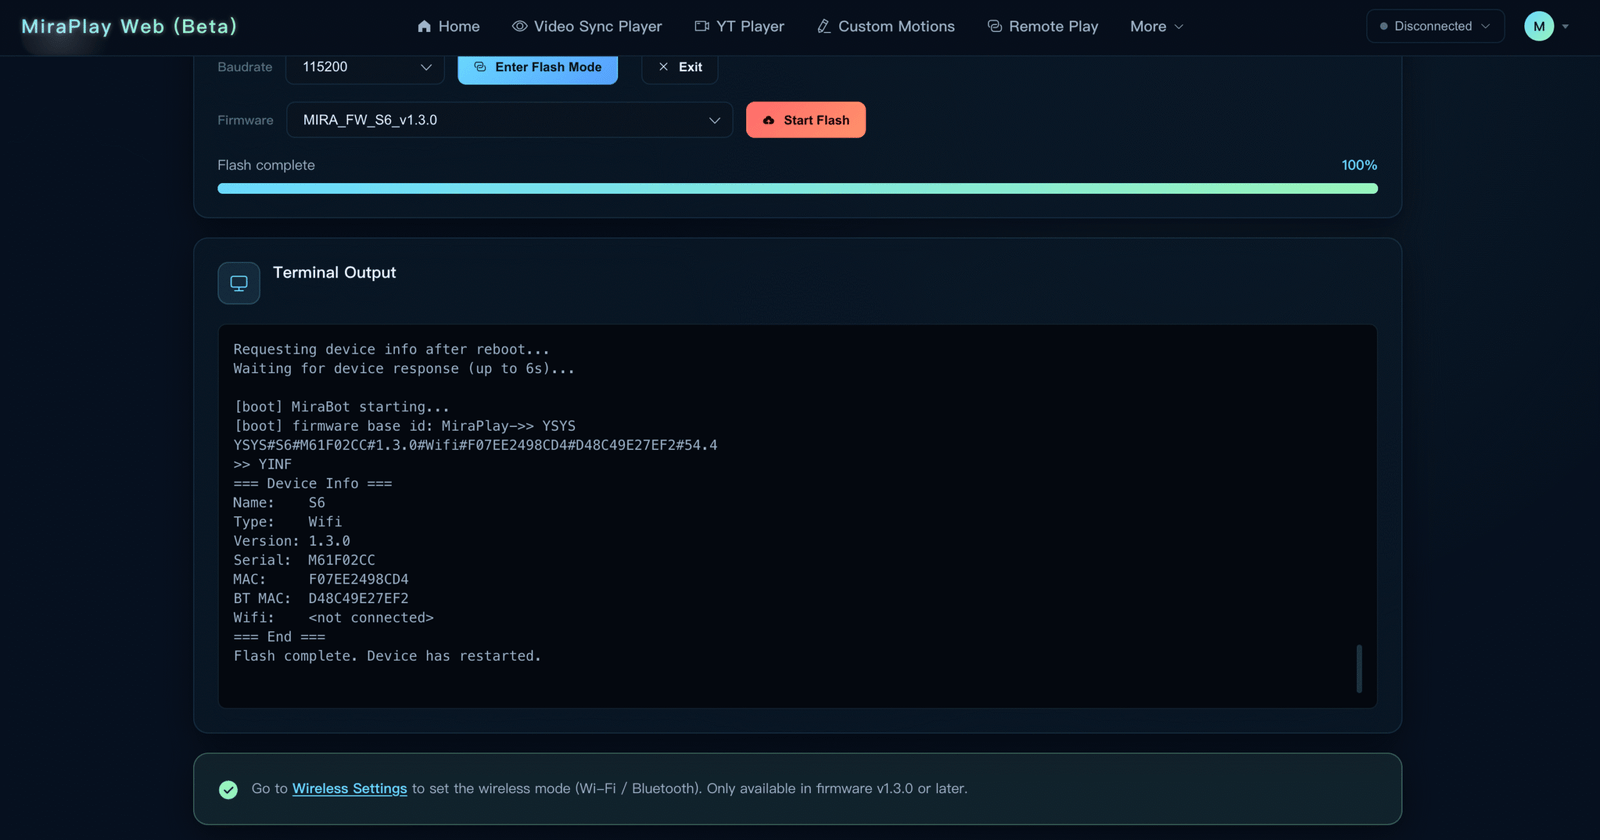
- Wait until the update reaches 100% or shows “Update Complete”
Step 5: Set Wireless Mode
Once the firmware update is complete, you can immediately configure the wireless connection mode.
After the setup is complete, you can change the wireless connection mode again at any time in Wireless Settings.
Step 6: Disconnect and Restart
After the update, disconnect the USB connection if needed and restart the device as instructed.
Initial Position Check
Check your device’s initial position after powering on.
MiraBot S6
Ensure the receiver and all arms are aligned.
If the receiver is tilted or arms appear uneven, use the Arm Initial Setting in MiraPlay AiO to fine-tune positions.
Adjust slowly and avoid forcing the arms.
MiraBot Lite
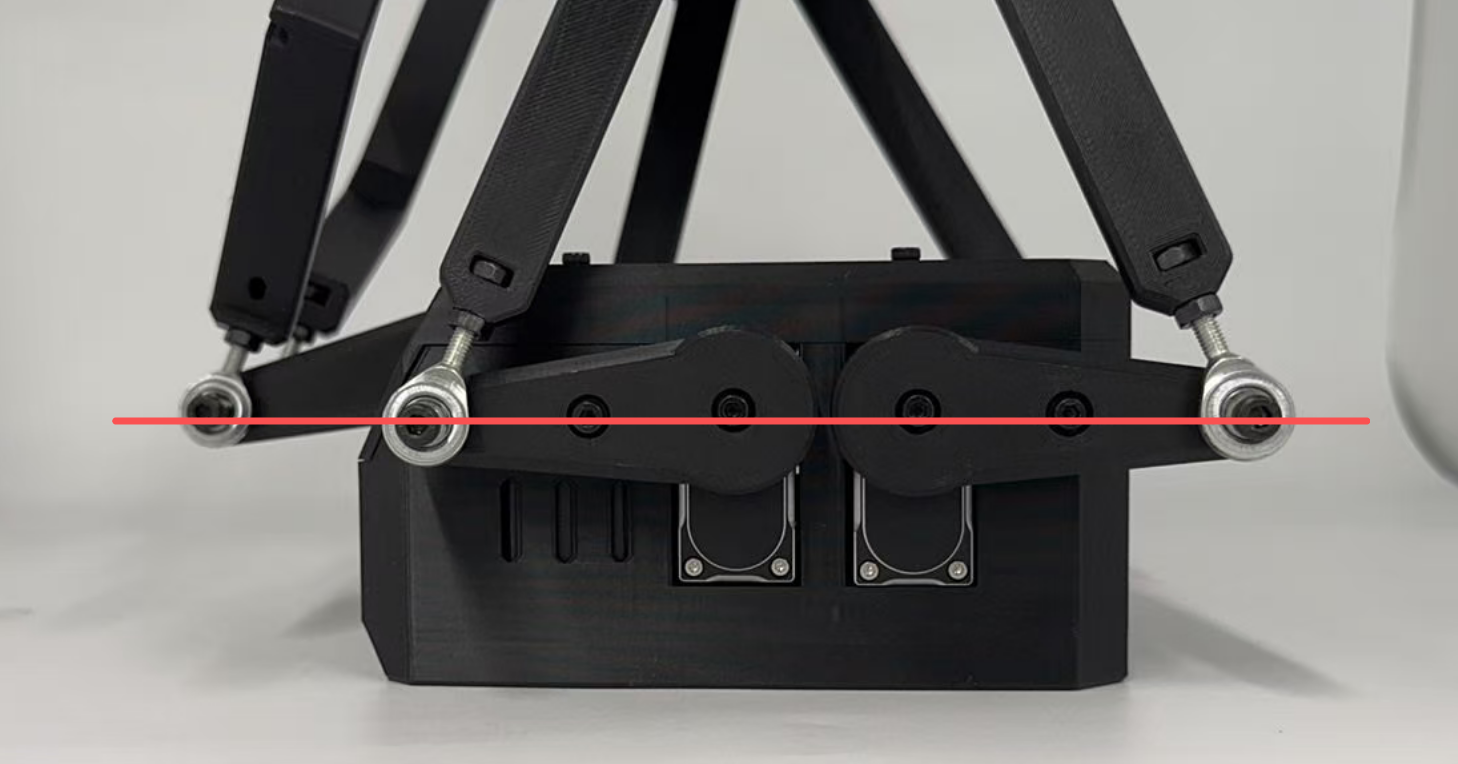
For Lite, check the pitch section:
- Pitch should be approximately perpendicular to the arm at 90°
- Pitch link should remain parallel to the arm
Refer to the diagram below for reference.
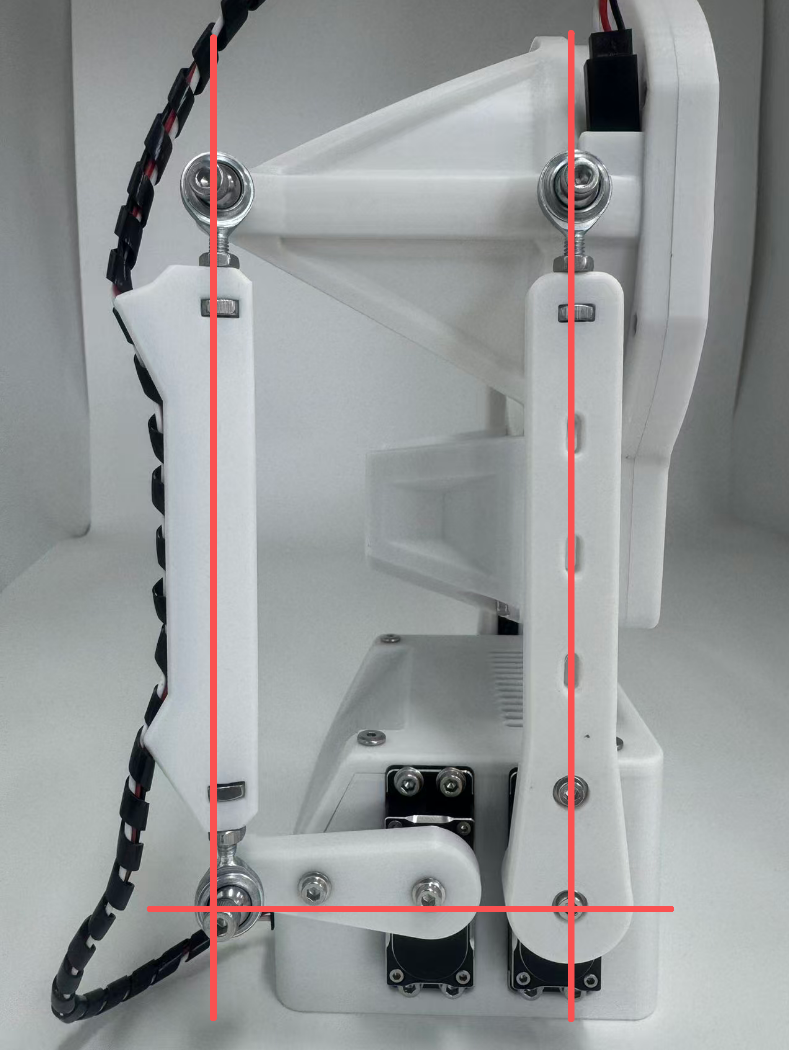
Adjust using Arm Initial Setting if necessary. Move slowly and avoid forcing the structure.
If alignment is off:
- Open Tools → Arm Initial Settings.
- Fine-tune each axis using + / −, based on the default value (1500).
- + = clockwise micro-adjustment
- − = counterclockwise micro-adjustment

Common Troubleshooting
Firmware update does not start or progress
Check the following:
- Correct USB / serial port selected
- Try another USB port or cable
- Close other apps using the serial port
- Restart Chrome and try again
Wi-Fi / Bluetooth connection issues
- Ensure the device is in the correct wireless mode
- Wi-Fi network is 2.4GHz, SSID and password correct
- MiraPlay AiO updated to v1.7.6 or later for SLR-compatible mode
“Failed to connect with the device” during firmware update
If this error appears, the ESP32 may not have entered flashing mode correctly. A detailed troubleshooting guide is available:
What should I do if I see “Failed to connect with the device” when flashing firmware?
Operation Test
After updating or restoring the firmware:
- Open MiraPlay AiO
- Connect MiraBot using your selected wireless mode
- Run a motion test and confirm all axes move correctly
- S6: up to 6-axis motion
- Lite: up to 4-axis motion
Stop testing if any axis behaves unexpectedly and check the connection, power, and firmware.
Contact & Support
If you encounter any issues not covered here, please contact us with:
- Order number
- Current firmware version
- Screenshot or description of the issue
Use the Contact Us page on the official MiraBotX website for support.