
What this guide covers
This guide is based on FunscriptPlayer 1.4.4 and focuses on using its built-in “Simulate Game” feature to play multi-axis funscripts with MiraBot.
Before you start
You will need:
- A Windows PC
- A MiraBot device connected by USB
- A matching set of multi-axis funscript files
Step 1 — Download FunscriptPlayer and install the required runtime
Downloads: FunscriptPlayer | .NET 7 Desktop Runtime
- Install the .NET 7 Desktop Runtime first if it is not already installed on your PC.
- Then extract FunscriptPlayer to an easy-to-access folder, such as D:\FunscriptPlayer.
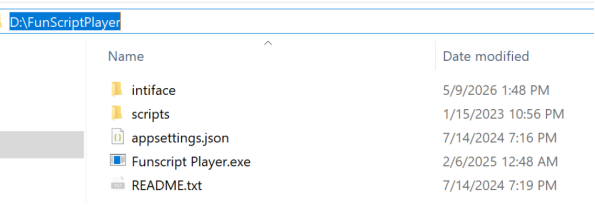
Figure 1. Example FunscriptPlayer folder structure.
Step 2 — Connect MiraBot and check the COM port
- Connect MiraBot to your PC using a USB data cable.
- Open Windows Device Manager.
- Expand Ports (COM & LPT), then find the USB serial device and note the COM port number. In the example below, the device is connected to COM3.
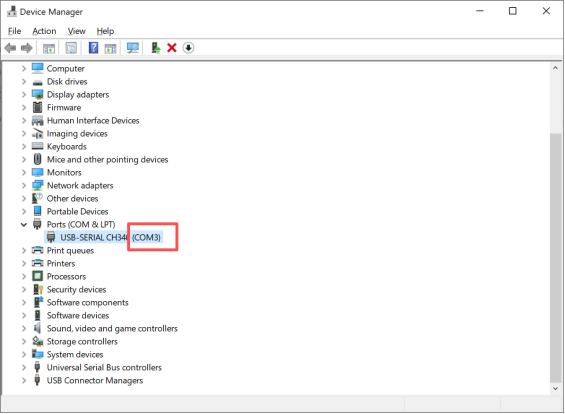
Figure 2. Example COM port shown in Windows Device Manager.
Step 3 — Configure FunscriptPlayer for MiraBot
Open the `appsettings.json` file in the FunscriptPlayer folder with a text editor.
- Set FunscriptPlayer to use OSR mode:
| “ConnectionMethod”: { “Buttplug”: false, “OSR”: true } |
- Find the OSR configuration section. Enter the COM port you found in Device Manager and make sure multi-axis playback is enabled:
| “OSRConfiguration”: { “COMPort”: “COM3”, “EnableMultiAxis”: true } |
If your device appears on a different COM port, replace COM3 with the port number shown in Device Manager.
Step 4 — Prepare the multi-axis funscript files
Create a separate folder for your multi-axis script set inside the FunscriptPlayer `scripts` directory.
Make sure the main script and its axis files use matching filenames, as shown in the example below.
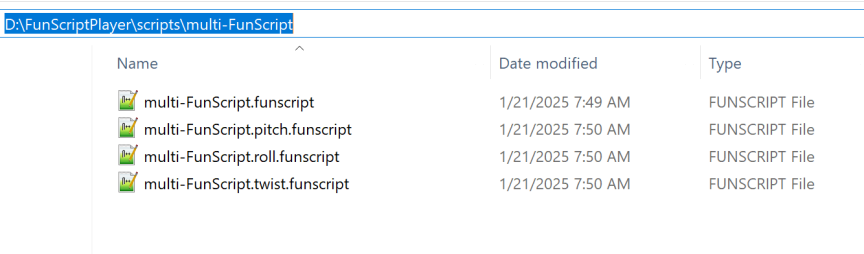
Figure 3. Example multi-axis funscript files in a dedicated script folder.
Step 5 — Play the multi-axis script
- Open “Funscript Player.exe” from the FunscriptPlayer folder and wait for the device to connect. Once connected, FunscriptPlayer will display the device information.
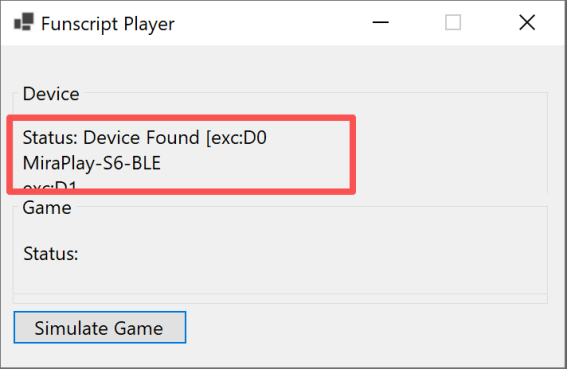
Figure 4. FunscriptPlayer showing MiraBot as a detected device.
- Click “Simulate Game” to open the GameSimulation window.
- Your script set should appear in the dropdown list, for example “multi-FunScript/multi-FunScript”. Select it, then click “Play Gallery” to start playback.
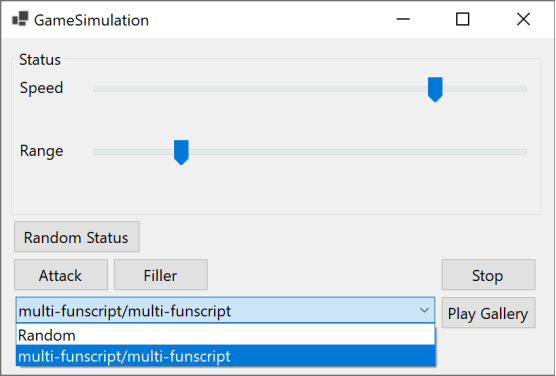
Figure 5. Selecting and playing a multi-axis script set from GameSimulation.
Quick checklist
- `ConnectionMethod` is set to OSR.
- `OSRConfiguration` uses the correct COM port.
- `EnableMultiAxis` is set to `true`.
- All axis files are in the same dedicated folder under scripts.
- All files use the same base filename.
- FunscriptPlayer was restarted after editing appsettings.json.
Basic troubleshooting
| Symptom | What to check |
| Device not found | Check the USB cable, confirm the COM port in Device Manager, and make sure appsettings.json uses the same COM port. |
| Only the main axis moves | Confirm `EnableMultiAxis` is set to `true`. Also check that the pitch, roll, and twist files use the same base filename as the main funscript file. |
| Script set does not appear | Make sure the script files are placed in a dedicated folder under `scripts`, then restart FunscriptPlayer. |
Notes
This article covers the basic local playback workflow only. Advanced game-mod integration depends on the specific game or mod and may require additional setup outside FunscriptPlayer.
FunscriptPlayer is a third-party community tool. Interface labels and configuration details may change in future versions.