
Experience the Hottest Interactive Adult Gaming—Right at Home
In this guide, we’ll walk you through a powerful new way to enjoy interactive adult gaming by combining the immersive PC game Virt-a-Mate (VaM) with the physically responsive device MiraBot.
Even if you’re new to VaM or OSR-style devices, don’t worry—this article explains everything step by step.
By using the ToySerialController plugin, you can synchronize in-game animations with real-world motion, creating a level of realism that traditional setups simply can’t match.
1. MiraBot Connection Requirements
At present, MiraBot has two firmware options: Wi-Fi firmware and Bluetooth firmware. With the Wi-Fi firmware, MiraBot can connect to Virt-a-Mate via USB or wirelessly via UDP. With the Bluetooth firmware, MiraBot currently supports Virt-a-Mate connection via USB only
2. Installing ToySerialController
2.1 Downloading the Plugin
ToySerialController is a free plugin available through the VaM community and GitHub.
- Download the latest ZIP file from the official source
- Extract the contents on your PC
- You’ll be ready to install it into Virt-a-Mate in the next steps
Once installed, this plugin allows MiraBot to receive real-time motion data directly from VaM animations—unlocking true game-to-device synchronization.

2.2 Installing into Virt-a-Mate (VaM)
After extracting the downloaded files:
- Copy the extracted folder into VaM’s “AddonPackages” directory.
- Launch Virt-a-Mate.
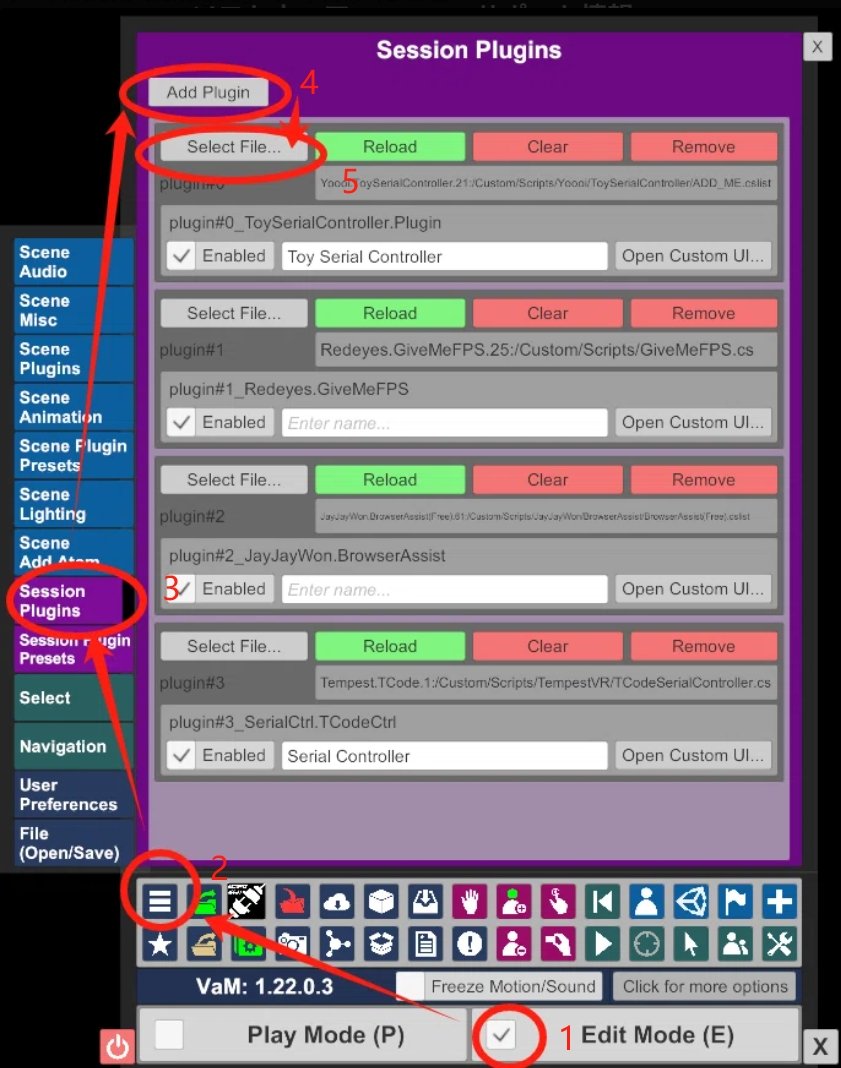
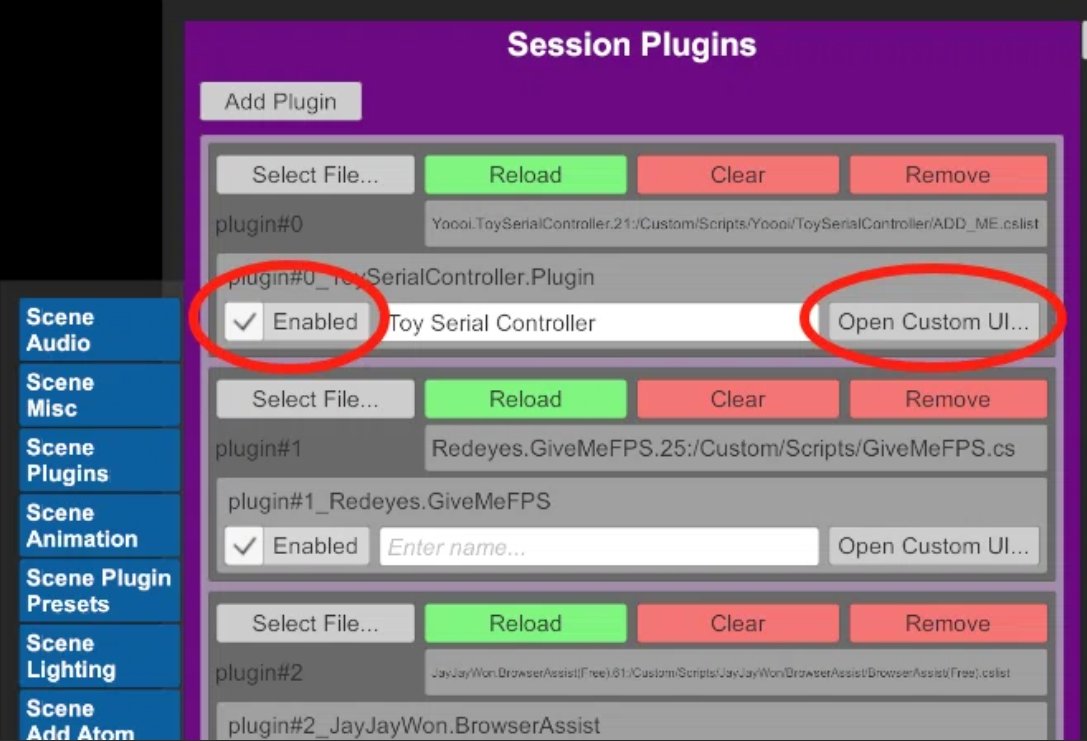
- Open the Settings menu and enable ToySerialController.
That’s it — the plugin is now installed and ready to use.
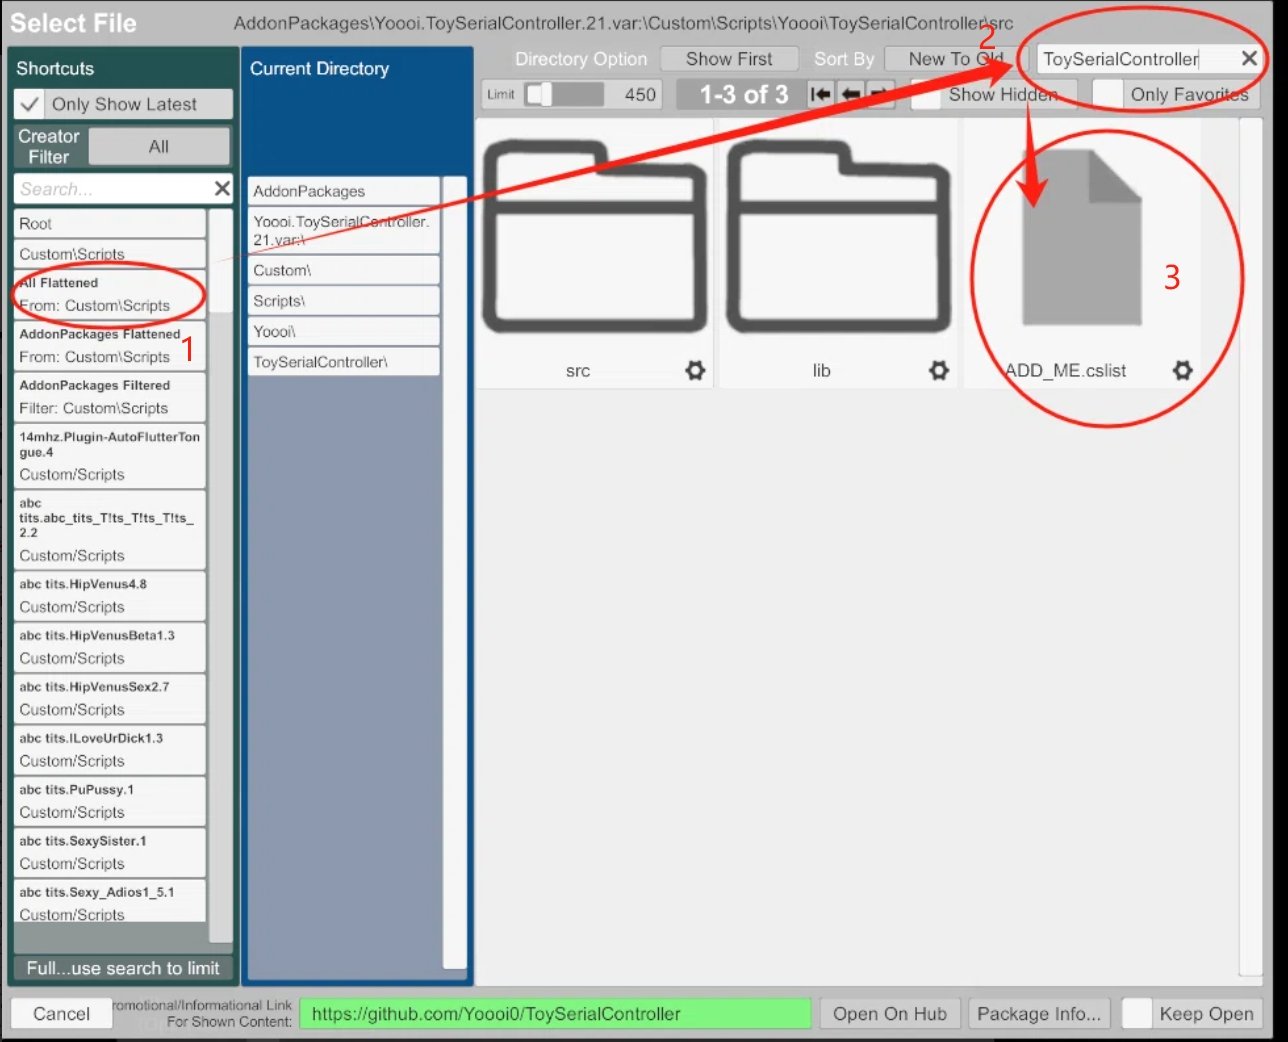
Please follow the menu sequence shown in the screenshot below to complete the setup.
3. Connecting MiraBot (OSR-Compatible Device)
Configuring ToySerialController in VaM
Open the ToySerialController settings panel inside VaM.
MiraBot supports two connection methods in ToySerialController:
- Serial (COM port) for wired USB connection
- UDP for wireless Wi-Fi connection
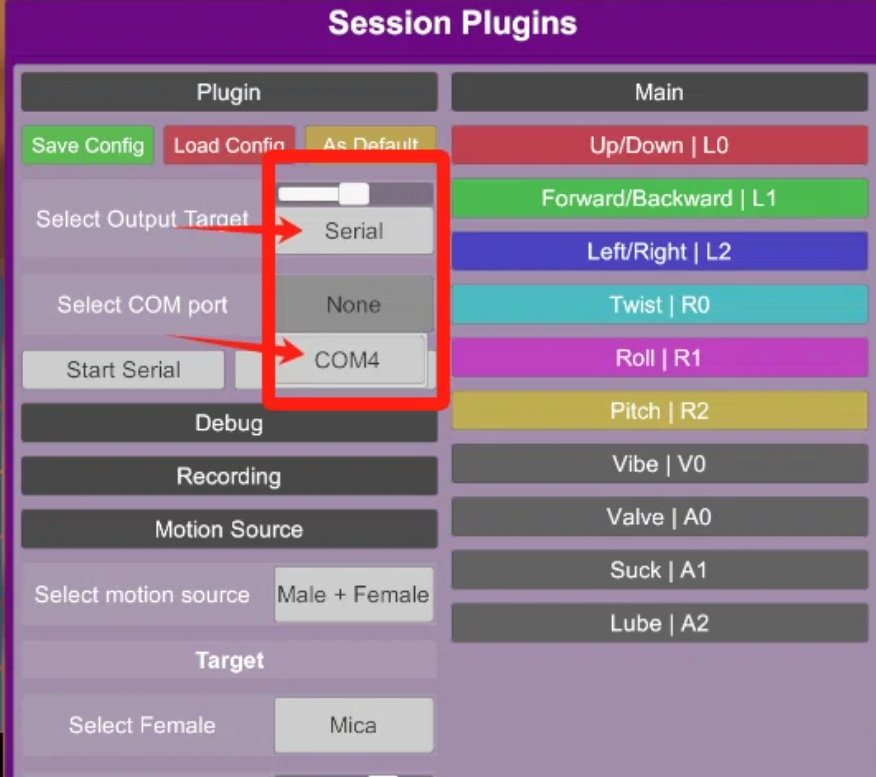
Option 1: Serial (Wired USB)
- Set Select Output Target to Serial
- Choose the correct COM port number (the one assigned to MiraBot)
- Click Start Serial
Option 2: UDP (Wireless Wi-Fi)
- Set Select Output Target to Udp
- In Address, enter: mirabot.local
- In Port, enter: 8888
- Click Start Udp
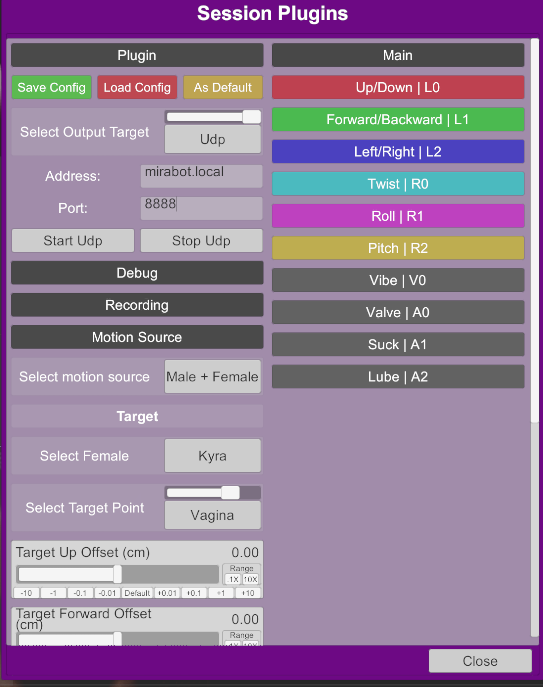
If the connection is successful, MiraBot should now respond to in-game animations and begin syncing with the scene.
4. In-Game Animation Sync Setup
4.1 Syncing with Character Motion
In Virt-a-Mate, you can synchronize MiraBot’s movement with a character’s motions and animations in real time.
By linking MiraBot to key movements—especially hip motion and thrusting—the experience goes far beyond that of a standard automated toy, delivering a much deeper sense of immersion.
The result is a highly realistic, responsive interaction that reacts directly to what’s happening in the scene—an experience that truly feels like a glimpse into the future of interactive adult games.
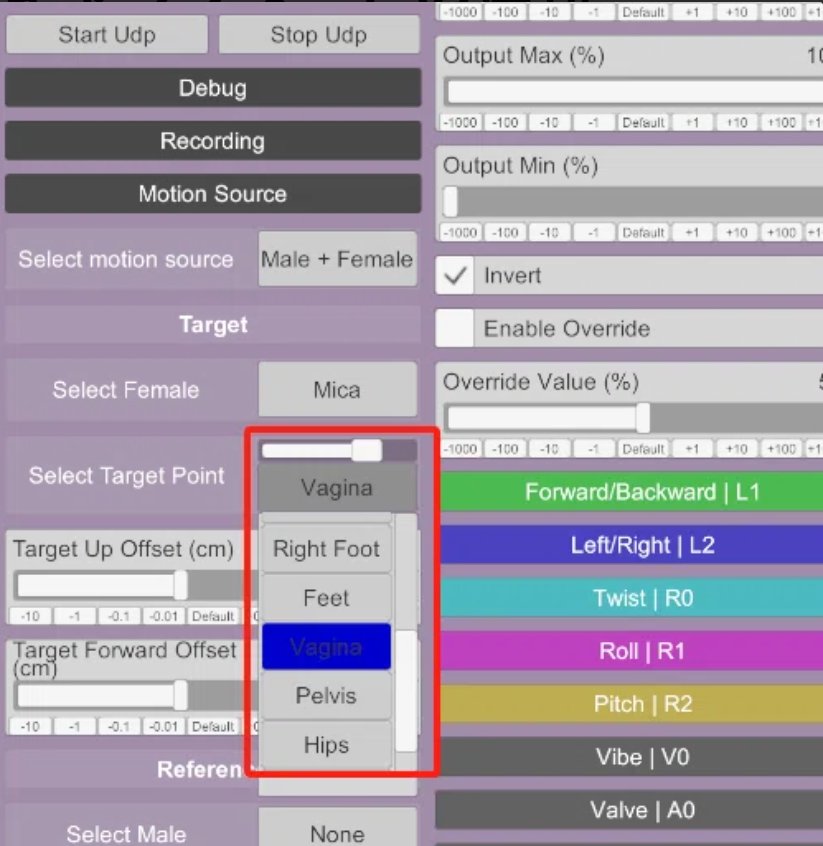
4.2 Fine-tuning the motion to your preference
Within ToySerialController, you can adjust parameters such as speed, stroke range, and response timing.
By fine-tuning these settings to match your personal preferences, you can fully unlock the potential of a PC-connected adult device and achieve a more immersive, satisfying experience.